
Open Creative Studio is pre-configured to generate images with the FLUX.1 Dev model.
After downloading the workflow, just run it.
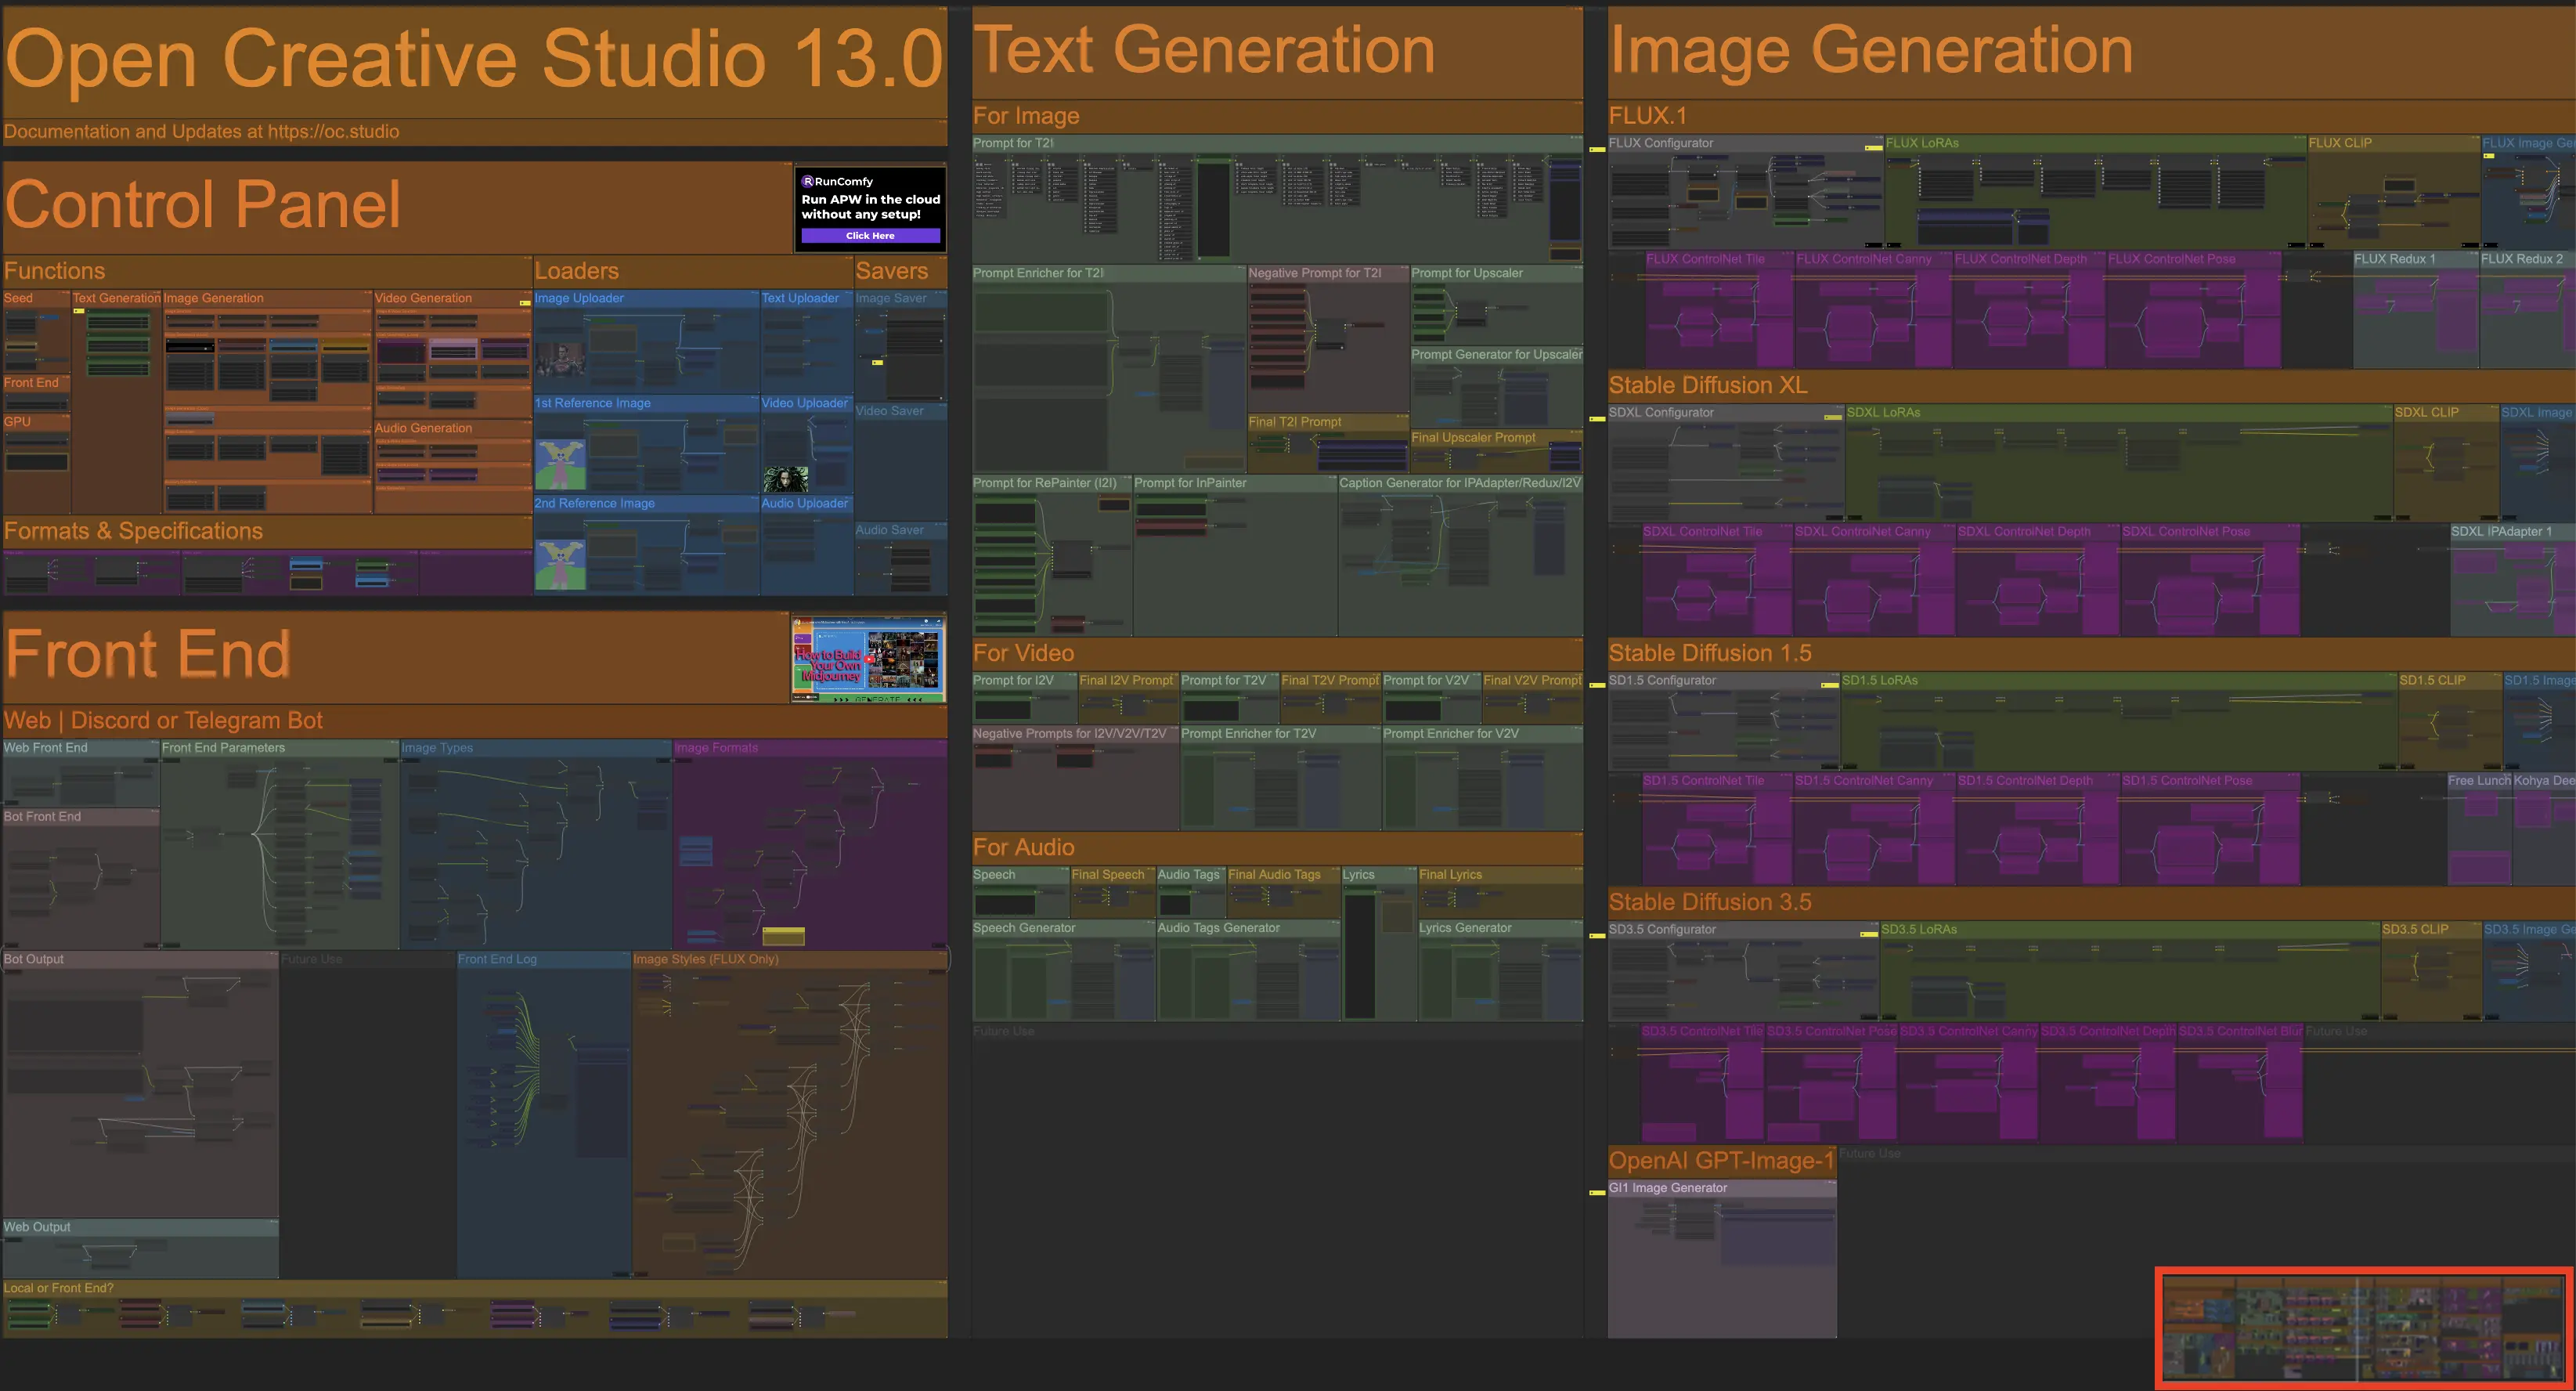
You have nothing to configure, and a default prompt has been set for you in the Prompt for T2I function, inside the Prompts section of Open Creative Studio.
Check the outcome of your image generation in the Image Saver function, inside the Control Panel section of Open Creative Studio.
WARNING: If ComfyUI doesn’t generate anything, you might have a problem with your installation, or the custom node suites you have already installed are incompatible with the ones necessary to run Open Creative Studio.
Check carefully the installation instructions on the Download page.
Once you have established that the workflow is generating images correctly, you are ready to discover the many functions of Open Creative Studio.
Keep reading!
Navigation
Open Creative Studio is a large ComfyUI workflow, and dragging the canvas with your mouse is not the most efficient way to move across its many functions.
To speed up your navigation, Open Creative Studio features several bright yellow Bookmark nodes to hyperjump to key functions, and a Minimap for quick panning.
Bookmarks
Below you’ll find a table with the Bookmark nodes that have been preconfigured for you.
Pressing the letter or number associated with each Bookmark node will take you to a specific Open Creative Studio function.
You can move these nodes around the workflow to better suit your navigation style.
You can also change the letter/number associated with them as well as their zoom level (useful if you have a large monitor).
The following Bookmark nodes have been preconfigured for you:
| § | Image Comparer (Source vs Edited) |
| 1 | Seed |
| 2 | Functions on/off |
| 3 | Loaders |
| 4 | Formats & Specifications |
| 5 | Prompt for T2I |
| 6 | Prompt Enricher for T2I |
| 7 | Face Analyzers and Swappers |
| 8 | Image Finishers |
| 9 | Trajectory Editor |
| 0 | Savers |
| ALT + 1 | FLUX Configurator |
| CTRL + 1 | FLUX LoRAs |
| ALT + 2 | SDXL Configurator |
| CTRL + 2 | SDXL LoRAs |
| ALT + 3 | SD1.5 Configurator |
| CTRL + 3 | SD1.5 LoRAs |
| ALT + 4 | SD3 Configurator |
| CTRL + 4 | SD3 LoRAs |
| ALT + 5 | QI1 Configurator |
| CTRL + 5 | QI1 LoRAs |
| ALT + 6 | GI1 Configurator |
| ALT + 7 | RePainter Configurator |
| CTRL + 7 | RePainter LoRAs |
| ALT + 8 | InPainter Configurator |
| CTRL + 8 | InPainter LoRAs |
At any given time, you can see the full list of configured Bookmark nodes by clicking on the bookmark icon in the ComfyUI top bar.
NOTICE: a Bookmark node works even when it’s muted or bypassed.
Minimap
To further help you navigate Open Creative Studio, you can use the Minimap you see at the bottom right of the screen.
You can move the minimap around, or increase its size, by holding CTRL and, when the cursor changes its shape, dragging it from the center or from the edges.
Color Coding
Open Creative Studio reserves certain colors to mark functions and nodes that have specific roles.
Dark Blue
The dark blue color is reserved for nodes that have a debug purpose.
For example, here’s a function with two debug nodes:

These nodes create many redundant outputs and print a lot of debug information in the ComfyUI terminal.
It is recommended that you keep them active until you have a solid understanding of how Open Creative Studio works. After that, you can safely mute or delete them without impacting the behavior of any function.
That said, certain debug nodes (for example, the ones dedicated to logging) might depend on other debug nodes. So, you’ll want to disable or delete all the relevant ones.
